Emily wanted a "western" style curtain she'd seen in a magazine. Only problem - the price in the magazine was over $100. Considering she just bought her "new" house, she didn't want to spend that much money on a lowly shower curtain. Instead we went shopping and found fabric she liked (and on sale.)
Her choice was a blue/green upholstery weight fabric for the main part of the curtain and a tooled "leather look" for the accent piece on top and bottom. She did buy some decorative trim, but I lost my mind when I started sewing the curtain together and I did not remember her purchase.
Hence...I made miles of piping to add as decorative trim.
Now, the only reason I decided to make the trim was because the curtain looked so plain when I sewed the side panels on to the main body of the curtain. That decision created a whole new "problem"...more on that later.
First...a reminder of the bathroom before. Emily decided the color in the bathroom was good (the old homeowners had just painted in here.) She took the mirror down to paint, and decided to paint the vanity and will paint the cupboard.
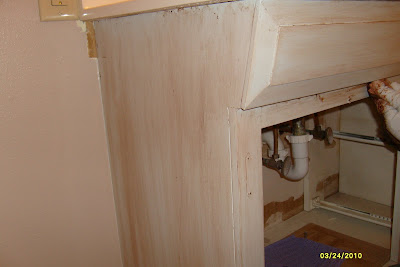
The vinyl trim around the bottom of the vanity was removed first. Peter will replace that with a nice piece of molding. And, of course all the drawers and doors had to be removed and painted. Emily chose the same blue that her dresser and vanity are painted.
As you can see from the very top of this picture...I'm going to also wax and buff this cabinet.
Stay off the wall!
Ohhh...gotta work it in before it starts to dry dark.
Again, if you're going to wax your piece, stay with long strokes and follow the grain.
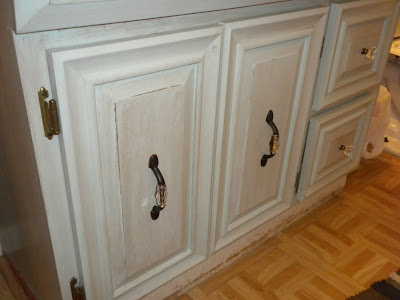
Same thing with the door and drawer fronts. Layer the wax one layer at a time until it's as dark as you like.
Completed vanity! The darke handles look good on the light blue background.
Now...back to the shower curtain. Grommets were added along the top edge so it could hang with the curtain liner.
This picture depicts a more true color of the curtain.
NOW...can you see that pretty decorative piping going through the middle of the side panel...with the cute buttons right above the piping? When I decided I didn't like how "plain" the panels looked sewn together I started ripping out the seam I had sewn earlier. During that 'ripping' process, the fabric ripped right across this portion of the panel. YIKES! I didn't have enough fabric for another full panel! What to do?
Plan B...sew the decorative piping across this piece and add the western buttons along the top of the piping.
Luckily...Emily thought it was cute!
Here is the completed curtain. I scalloped the bottom just to give it a little more feminine look and feel.
Of course, there is still much to be done (sewing wise.) I have curtains to finish for the window and the bottom part of the built in cabinet! (Emily also has to paint the cabinet so I can wax it too.)
Progress is being made...but it feels slow right now. More sewing to do this weekend, which will give Emily more time to finish unpacking the rest of her boxes.
Till tomorrow...
debi


1 Cowgurls said:
Hey Debi,
Had to check in and see what you were up to.
I really like your shower curtain! and the colors are wonderful! The buttons and piping dressed things up nicely!
At some point, I will get brave and use the wax idea.
Just not at this house. Our Forever house maybe.
Take care,
Terri
Post a Comment