
I'll just make my confession right here...I'm a bleaching girl! Sinks, tubs, tile, hair (ha!ha!ha!)...whatever can be bleached. I have a white porcelain sink that I bleach at the end of every day when all the dishes are loaded in the dishwasher. Or, I might bleach it when I get home from work at noon because it looks a little dirty. Or, perhaps I bleach it when I sweep through the kitchen cleaning everything in my wake. (You get the picture.)

My favorite form for bleaching is the "spray" version. It does the job quickly and I'm usually happy. However, it also has a tendency to "back" spray. I try to remember to put on an apron or lean way back...to no avail.
Now I also own a "favorite" cleaning shirt...it's old and comfortable and is perfect for those cleaning days when I'm spraying everything. Here's a close up of the spec of bleach that hit the shirt (I never see the over spray on anything until wash day.)
This shirt is also a favorite for cooking ...grease popping bacon was the last adventure.
Needless to say, it's a pretty sad shirt, but perfect for my experiment of "rebirth"!

I came up with a swirly design and used my fabric pencil to make a few guide lines (just to be sure I included my bleach spot and a few of the grease spots into my design.)
Don't forget to place something (I used a plastic grocery bag) between your shirt layers to prevent the bleach from leaking through to the back of your garment.

I used a bleach pen to draw out my design. Be sure and shake your pen very well before you begin your project. It tends to be a little watery, so keep moving with the pen. You can always go back and retrace a line you want thicker or darker. If you sit too long on one part of the fabric with the pen the bleach will slowly spread.
Once you have your outlines complete you can go back and fill in any area and make extra swirls, dots, etc.

You will want to let the bleach sit on your fabric about 10 minutes, or depending on how light you want your design to bleach out your fabric. Once it looks "right" to you, rinse off the bleach.
I left my plastic bag inside until I rinsed all the bleach off the shirt.
I ran the shirt under warm water for several minutes.

When your bleaching process is complete, the fabric must be neutralized to stop the corrosive action of
the bleach.

You can do this by first rinsing the fabric in water and then soaking it in a solution of 1 part hydrogen peroxide to 10 parts water for about 10 minutes.

After neutralizing, wash the fabric in warm soapy water, and rinse it thoroughly. You might want to go ahead and throw it in the wash and give it a good cleaning. I did not put mine in with another load of clothes, just in case there was any active bleach left on the shirt.

Now that it is dry...I am ready to wear my new creation...and no new bleach "over spray" will even be noticeable.
BUT if I do get "over spray" on my "new" shirt, I'll just add more swirls and dots!
Here is my finished product...I might even be able to wear it in public again...
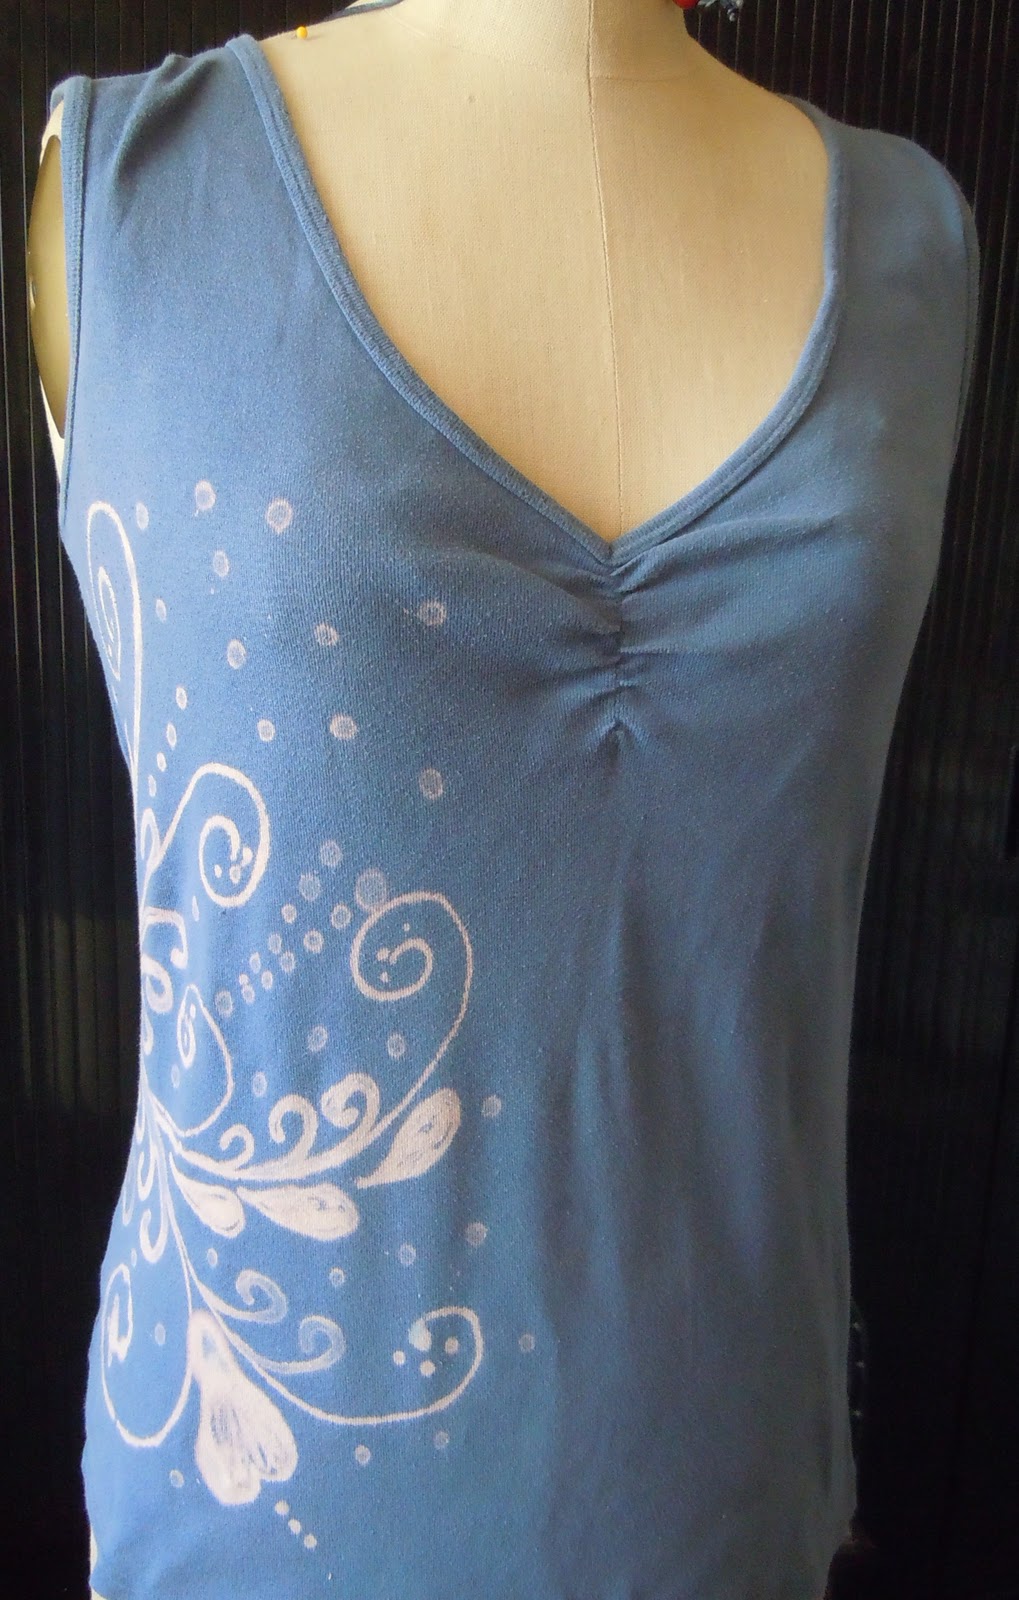
at least to take a walk!

Tomorrow I'll show you the apron I've been working on and some fabric flowers.
Till then...
debi


2 Cowgurls said:
That looks great! Now what will you wear for your cleaning shirt? I hate it when I find something has come through the wash with little white polka dots in the middle =( A cleaning shirt is a good idea--but then I would need to plan ahead =)
Nice job...
Post a Comment