Pages

Showing posts with label floor project. Show all posts

Thursday, July 26, 2012

Small Bathroom Makeover - Completed

This small bathroom makeover began here, on December 22, 2010 (and here and here and here)...I can't believe it's been that long!
This is where it all began...wanting to get rid of this flooring.


After 10+ years of girls doing hair, makeup, cleanup, mess-up's...this bathroom had seen better days!

My husband added the framework for the board and batten walls,

and added the vintage tin along the top.

All the walls and trim were painted white,


and the cabinet and upper cupboard were painted black.

At that point...the project went dormant.
I lived with the sub floor exposed while I searched for the perfect "finish" for this area.


I eventually painted two coats of Kilz and two coats of porch paint to seal the sub floor and to add a layer of protection.
All the while, I hunted for an idea for the wow factor for this room.

Last week while browsing on Pinterest I saw a stencil from the Royal Design website that seemed to be the perfect finish for this room.


I started painting the stencil in the corner and moved down toward the door.


The first row was finished fairly quickly...especially with the stencil being so large.


Working around the other items in the room was NOT fun! (Especially since the stencil was so large!)


But, the end result was well worth the work!
I already have two coats of sealer on it, and hope to add one more coat just to give extra protection to the floor.


I also want to add quarter round along the edge and put handles on the drawers to finish off this project...but in the very near future!
It has taken time to finish...but well worth the wait for the final results.

Till tomorrow,
debi

Friday, February 11, 2011

Floors

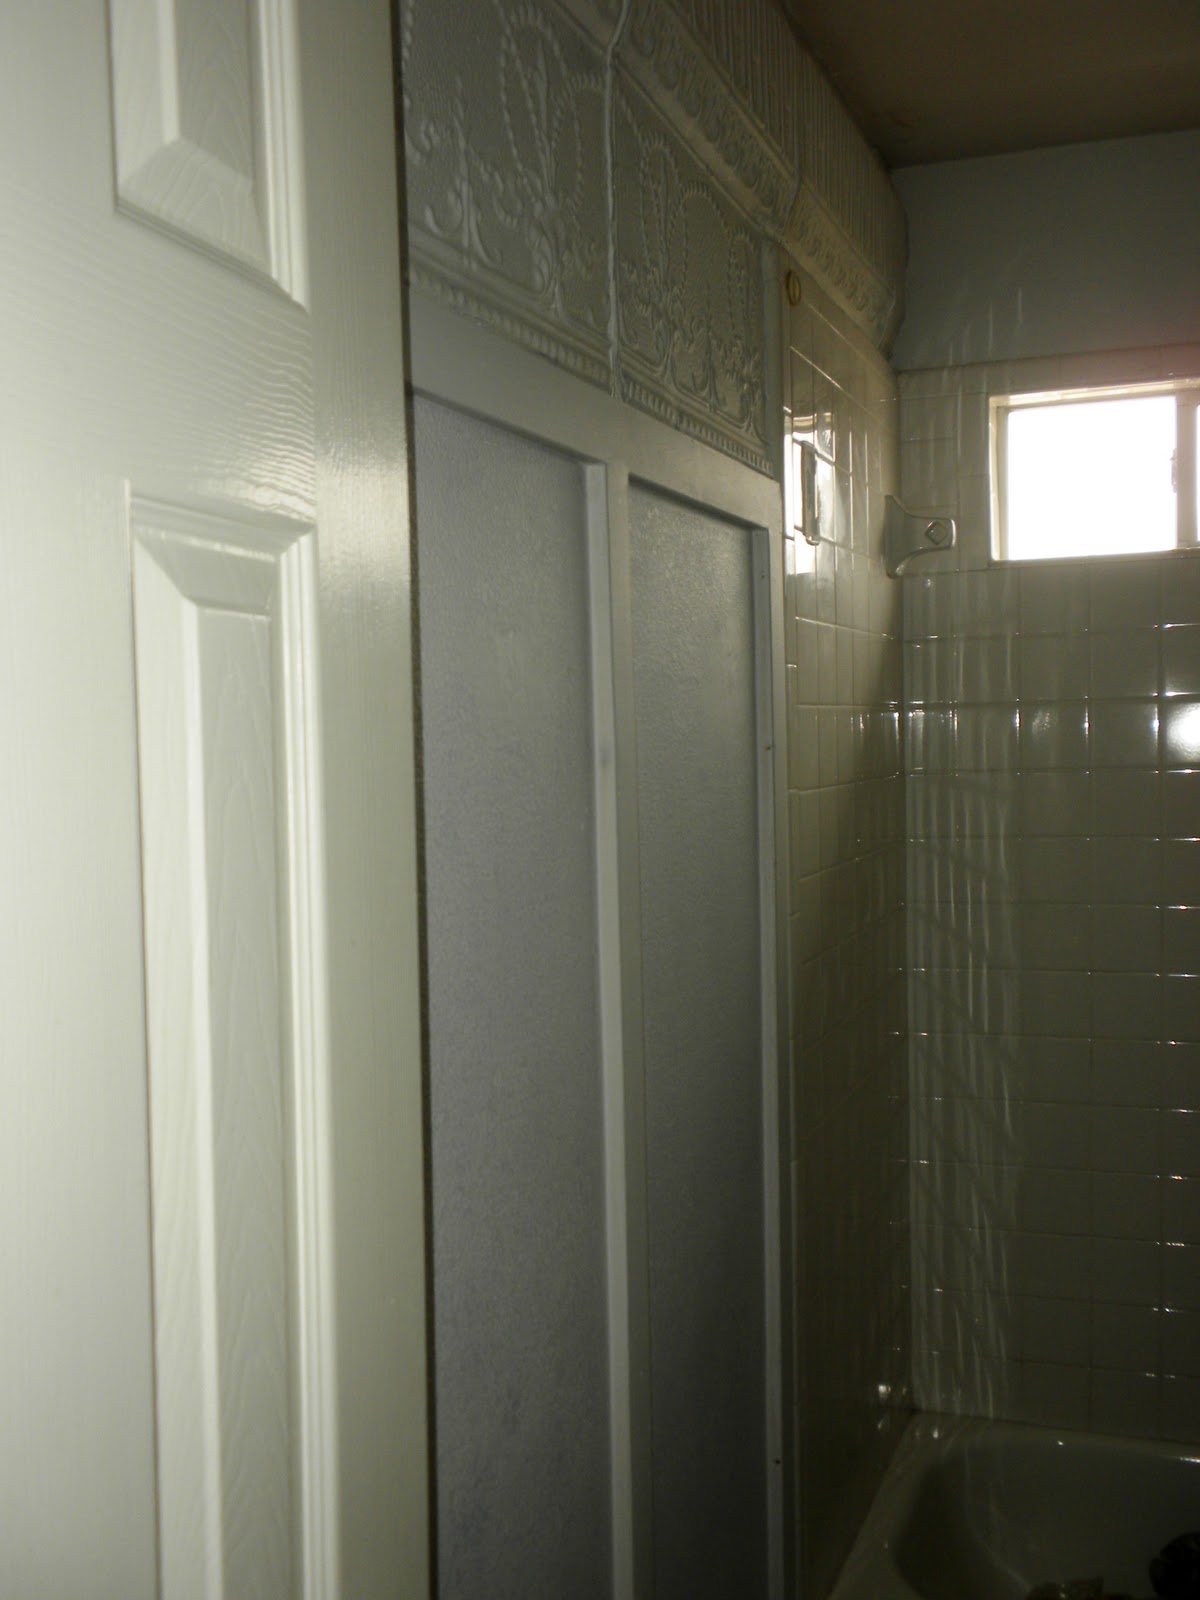
Since uncovering this "lovely" sub-floor in the upstairs bathroom, I've become obsessed with plotting what direction to take to refinish this bathroom floor.
I have several ideas swirling around in my head. 


I'm not afraid of "floor work"...At one point a few years back it seemed like all I was doing was "floor work."  This was one of the big floor projects I worked on a couple of years ago.


When we pulled the carpet up in this room, there a really ugly (and damaged)  floor underneath. Once the floor was cleaned of all staples and extra nails, we spent a lot of time bleaching out the old "animal" stains. We were finally able to sand the floors and  lay the grid lines. My daughter and I started with the darker of the two stains (Jacobean) and rolled it on first.  Once the dark stain was dry we rolled on the lighter stain (Pecan) over the whole floor.


The floor was then sealed with polyurethane.


This is truly one of my favorite floors.  Too bad furniture had to be moved in! HA!


My husband and son-in-law laid this floor.  When we pulled the carpet up in this room there was an old porch hiding underneath, but it was also covered with plywood.  So the decision was made to lay a new pine floor to match the flooring in the rest of the house.


On this floor I only masked off the outer perimeter, then stained it all Jacobean to match the color of the other hardwoods in the home.


Simple, but dramatic.


My next floor I worked on was again a total re-do.  After the carpet was removed, and once again millions of staples were pulled (the previous homeowners had stapled down the carpet padding!).  We rented a large belt sander from Home Depot and went to work.


The old floor came out beautifully once it was fully sanded and cleaned up.  (Notice ALL the dust along the edges of the walls!)  Sanding is messy work, but very rewarding!


The next step in here was applying the dark stain.


My son-in-law helped me wipe on the stain.  We eached worked from the sides to the middle and were able to adjust our color and intensity to match each other's strokes.  Having help makes the job go so much quicker.


We ran out of stain and had to make a Home Depot run, but all ended well as we worked out way out the door and into the hallway.
Most floor work is a lot of elbow grease but is very satisfying work.


Once the stain was completely dry, I used an over sized stencil in each corner as a decorative accent.


The design is painted on top of the stain, before the polyurethane is applied.


Again, in this small bath, the carpet was removed and the floor was sanded.  We had to use a palm sander in here because of how tight the space is!  I used the same stencil in here that I used in the bedroom...but I masked off some areas (so not to paint them) and turned it upside down to create another look.


The last floor project I worked on was again in a small bathroom that also had carpet.  When we pulled the carpet back to take a peek at the floor we saw what we thought to be a "nice pine floor" 

However, after pulling all the carpet out, there was a big square of plywood in front of the shower.

It was VERY OBVIOUS!!
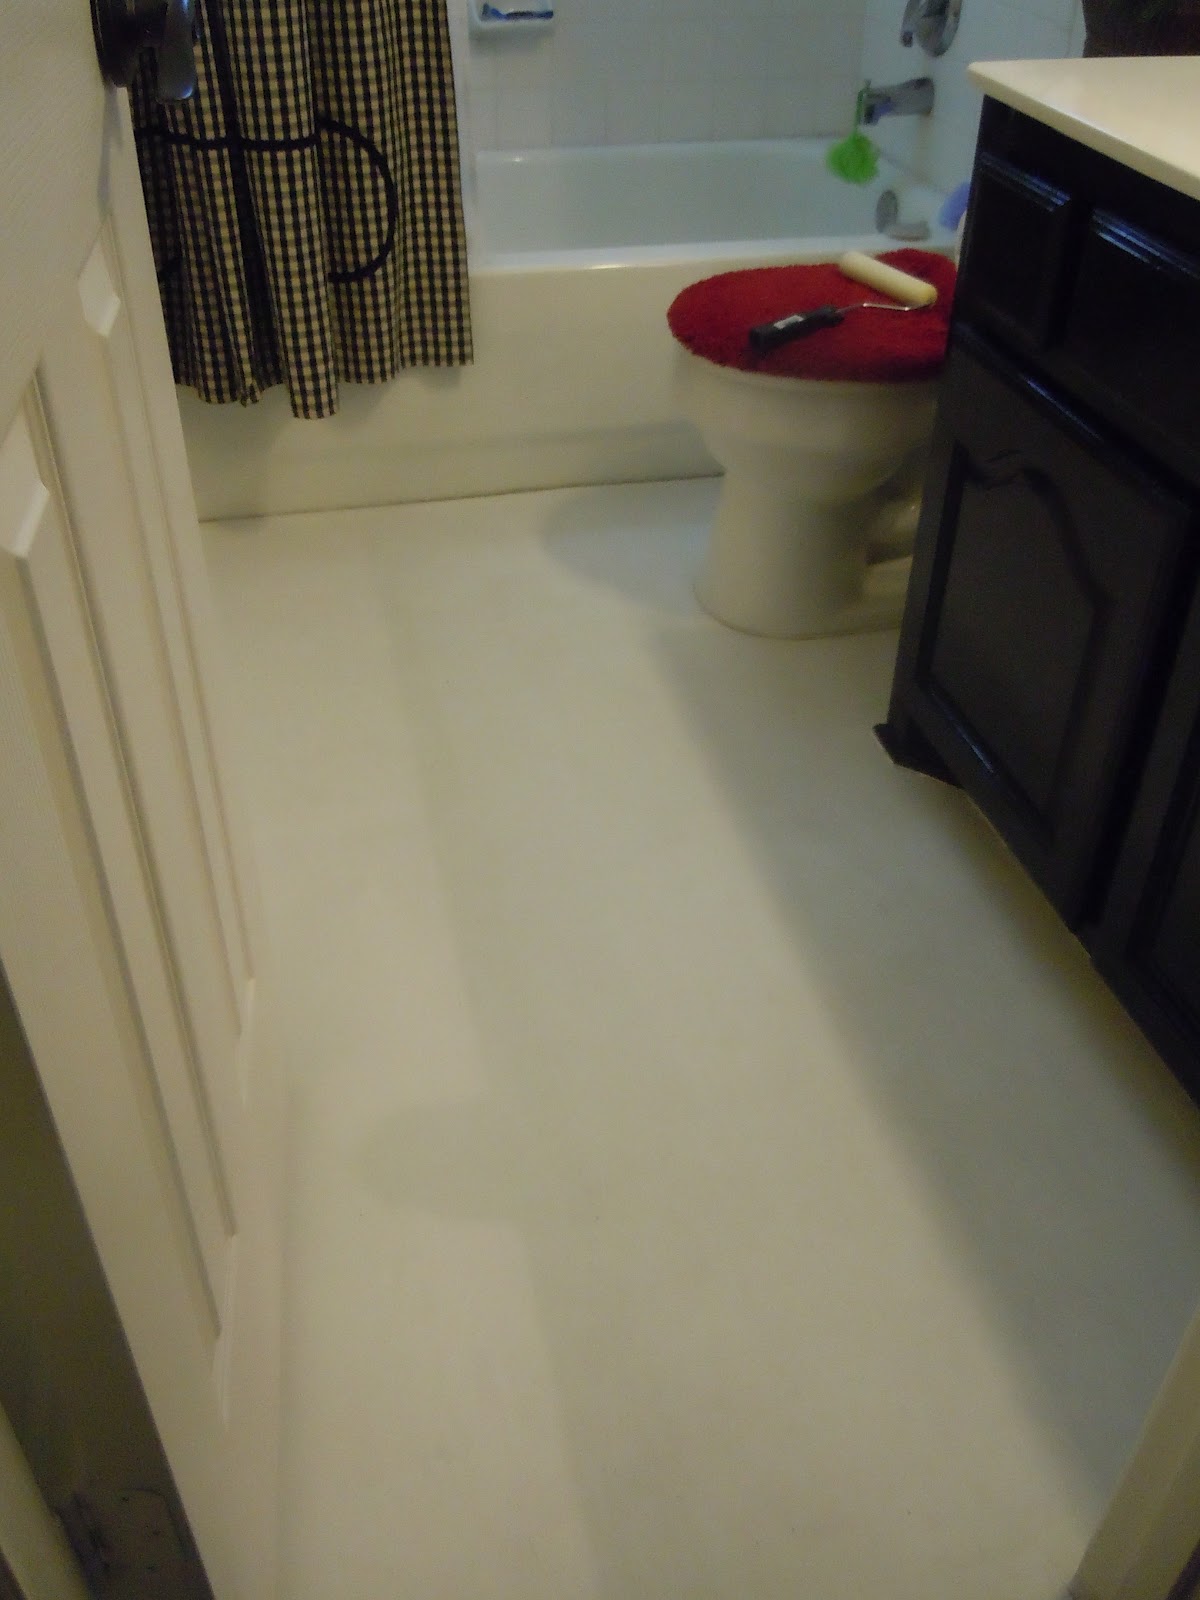
Well...Plan B better always be an option! So instead of refinishing the floor, I ended up painting the floor all white.  I also chose to hand painted a design in front of the sink instead of using a stencil.


 I also decided that rather than hidingthe fact there was a large piece of plywood right in the middle of the floor, I would play it up by making it look like a small bathmat in front of the shower.
I hand painted another design on the plywood and added the word "shower"...
I thought it turned out pretty cute!
Of course, looking back at these floors I want to find some "new" floor ideas.   I have found there were many others in blog land that had already thought about and/or completed the painting of a plywood floor.  Many bloggers gave pointers, step by step instructions, and some even listed the pitfalls of painted plywood.
But...the more I looked the more I thought that maybe I should pull out ALL the carpet upstairs. 
(My husband is NOT amused!)  Oh well...he'll go to work one day, and....................

Here are just a few of the ideas I came across that I think are over the top!

This image came from Design *Sponge.  I love the over sized design. (That would have to be for the whole upstairs area!)


I'm not a yellow girl, but this is so pretty.  This came from
Kelly Peterson at Paisley Wallpaper.
She goes into quite a bit of detail from prepping the floors to creating your own stencil. She has a lot of renovation work going on and I love her photo of the day.  Be sure and check out her blog.


This distressed floor is also painted a golden yellow color, but I love the soft worn look of the paint and floral design.
This image is from About.Com.


I found this wonderful lacy floor at Design *Sponge also,.
I would paint all my floors if they would look like this!


I think you'll also love Ashley Ann's DIY {stencil painted subfloor}.
 She gives a great tutorial from start to finish about painting a subfloor.
Ashley also created a pretty stencil she used on her floor.  Be sure and check out her blog.

I have much to think about regarding my very small floor...however, I still think ALL the carpet may have to come up (and very soon!)

Till tomorrow...
debi

Saturday, August 1, 2009

BIG Project - Weekend

We're still working on Miss Janice's bedroom and bathroom. The last couple of days we've pulled the carpet and padding out to reveal a floor in pretty bad shape.

Today was the big day to rent the sander from Home Depot and get it all cleaned up.

On Thursday we got the second coat of paint on the walls and the first coat of paint on the trim work in the bedroom.

We wanted to allow one full day for it to dry before we began with the sanding...and all the dust it makes!

The guys arrived with the sander and moved the large piece of furniture out of the room we'd been working around. Miss Janice finally found a consignment store that would take it to sell for her. They won't be able to pick it up until Tuesday, so it's been pushed into the hallway.

Here's one last look at the unfinished floor.

Here is it after a full morning (and into the afternoon) of sanding.

We are all thrilled with how well it cleaned up! Of course, the dust was EVERYWHERE!

But...the floor is beautiful. A few deep scratches, but once the color is laid down no one will notice.

There is also a mantel "project" to complete on this one wall...and of course the bathroom tile yet to be laid....but it will all come together shortly!

A great deal was accomplished today...clean up of the major dust happened before we all left, but we will wipe down the walls, trim and windows before we paint the baseboards next week!

Now...Miss Janice has to decide on the color for the floor. I think she's leaning toward Jacobean...which is the same color of all the other floors in her house. I think some decorative painting is in order! Maybe we can decided on a compromise!
Till next week...more to come.

Monday, April 20, 2009

Library Finished

As you remember...we began this project with delivery of the lumber (of course the actual start was moving everything out of the room!) This was Miss Janice's craft room, but had fallen in status to the "catch all" room and needed a good make over. Since we took out the carpet across the hall...this room just looked tired and outdated, or rather not in keeping with the "age" of the house!


Mike and Peter pushed themselves to finish the floor in one Saturday, along with the first coat of stain, due to a bridal shower scheduled for the next weekend. We knew we only had one week to put the room back together before the shower.

Once it was laid we taped off the border area that would remain the lighter pine color.

Mike, Emily and I got the stain on the floor that evening. Once it dried I came back and put down a coat of sealer. It looked good in initial pictures, however I didn't do enough stirring of the product and it did not look like this when it completely dried. It looked flat, dull and incomplete. I knew I'd have to put another coat on the floor...but the time table of the shower was dictating our actions...so we put the room back together.

It was a rush, but Ashely and I got the pieces of furniture back in place and unpacked a couple of book boxes to make the room look put together, but we knew...another coat of sealer meant removing the furniture again!

Shower over...Ashley and I moved all the furniture back into the hallway so I could put another coat of sealer over the floor. Ashley was very diligent in making sure we kept the product stirred and directing me in covering the floor evenly with the sealer.

Now that we were no longer under the pressure of an event - we had time to leisurely put the room back together. Miss Janice was able to touch up the walls where we pulled nails out. Peter and Emily put the quarter round down to finish off the floor and we touched up the white paint in the room.
Ashely and I brought back the furniture and then began unpacking the book boxes we'd stacked in Miss Janice's bedroom. We knew many of boxes were filled items we'd packed up from the original move of the bookcases, but there were also a lot of boxes Miss Janice had not gone through that she brought from her dad's house when he passed away. We left those boxes for her to decide what was of value to her (although we did pull out a lot of older books that we wanted to use in the library.)
One last item i felt needed to be changed were the curtains. I made them in 2003 for Miss Janice and they fit the feel of the room at that time, but I knew I wanted a little more sophisticated look and feel for the room since it was going to be a real library for her. These are the original toppers she had over the two windows in the room. You can also see them in the pictures above as we worked on the floor.

This Sunday afternoon we went to the Red Barn Antique sale and there was our answer. Six Waverly panels - offered at a discount...and a greater discount if we bought all six! Emily bought one (she will be moving into a carriage house in the historic district in two weeks...more on her decorating later) and Miss Janice purchased five.
We took them home and hung them right away. What do you think of the difference it makes in the room? We will still have to figure out what to do with the middle of the rod that shows...couple of ideas rolling around in my brain. I would also like to update/decorate the shades. Always a project in my mind!

Now to the room reveal....Miss Janice loves suitcases and has many. They had been stacked in the foyer, but I moved them to the shelves above the desk and moved the others into the room to use as displays.

Right side of the room as you enter....


Desk area...

Seating and bookcases....

Suitcase used to hold various books...


I enjoyed creating this room in every aspect...from the floor to the drapes. I hope you will enjoy you peak into Miss Janice's 1917 house. SO...till the next project...the bedroom makeover! However, that will have to wait until after the wedding. Much to do around here, along with Emily's move into the carriage house, then we can begin a new project at Miss Janice's.
Tomorrow I hope to reveal my aprons for the apron swap. Have to wait until my "partner" receives her package!
debi